
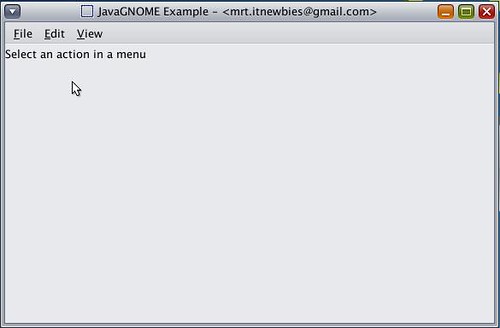
Contoh Menu JavaGNOME
Hm.. bagaimana teman-teman ? GNOME banget kan tampilan-nya
1 2 3 4 5 6 7 8 9 10 11 12 13 14 15 16 17 18 19 20 21 22 23 24 25 26 27 28 29 30 31 32 33 34 35 36 37 38 39 40 41 42 43 44 45 46 47 48 49 50 51 52 53 54 55 56 57 58 59 60 61 62 63 64 65 66 67 68 69 70 71 72 73 74 75 76 77 78 79 80 81 82 83 84 85 86 87 88 89 90 91 92 93 94 95 96 97 98 99 100 101 102 103 104 105 106 107 108 109 110 111 112 113 114 115 116 117 118 119 120 121 122 123 124 125 126 127 128 129 130 131 132 133 134 135 136 137 138 139 140 141 142 143 144 145 146 147 148 149 150 151 152 153 154 155 156 157 158 159 160 161 162 163 164 165 166 167 168 169 170 171 172 173 174 175 176 177 178 179 180 181 182 183 184 185 186 187 188 189 190 191 192 193 194 195 196 197 198 199 200 201 202 203 204 205 206 207 208 209 210 211 212 213 214 215 216 | /* * java-gnome, a UI library for writing GTK and GNOME programs from Java! * * Copyright © 2007 Vreixo Formoso * Copyright © 2007-2010 Operational Dynamics Consulting, Pty Ltd * * The code in this file, and the program it is a part of, is made available * to you by its authors as open source software: you can redistribute it * and/or modify it under the terms of the GNU General Public License version * 2 ("GPL") as published by the Free Software Foundation. * * This program is distributed in the hope that it will be useful, but WITHOUT * ANY WARRANTY; without even the implied warranty of MERCHANTABILITY or * FITNESS FOR A PARTICULAR PURPOSE. See the GPL for more details. * * You should have received a copy of the GPL along with this program. If not, * see http://www.gnu.org/licenses/. The authors of this program may be * contacted through http://java-gnome.sourceforge.net/. */ package javagnomeapplication; import org.gnome.gdk.Event; import org.gnome.gtk.CheckMenuItem; import org.gnome.gtk.Gtk; import org.gnome.gtk.ImageMenuItem; import org.gnome.gtk.Label; import org.gnome.gtk.Menu; import org.gnome.gtk.MenuBar; import org.gnome.gtk.MenuItem; import org.gnome.gtk.SeparatorMenuItem; import org.gnome.gtk.Stock; import org.gnome.gtk.VBox; import org.gnome.gtk.Widget; import org.gnome.gtk.Window; /** * How to use {@link Menu} and related Widgets. * * @author Vreixo Formoso * @author Andrew Cowie */ public class ExampleSimpleMenu { public ExampleSimpleMenu() { final Window w; final VBox x; final Label l; final Menu fileMenu, editMenu, viewMenu; final MenuItem fileNew, fileMenuItem, editMenuItem, viewMenuItem; final MenuBar menuBar; /* * Begin with the standard VBox in a Window setup: */ w = new Window(); w.setTitle("JavaGNOME Example - <mrt.itnewbies@gmail.com>"); x = new VBox(false, 3); w.add(x); l = new Label("Select an action in a menu"); l.setWidthChars(30); l.setAlignment(0.0f, 0.5f); /* * Most applications will use several Menus in a MenuBar: */ fileMenu = new Menu(); editMenu = new Menu(); viewMenu = new Menu(); /* * Now you can add MenuItems to the "file" Menu. */ fileNew = new MenuItem("_New"); fileMenu.append(fileNew); /* * Usually you will want to connect to the MenuItem.Activate signal, * that is emitted when the user "activates" the menu by either * clicking it with the mouse or navigating to it with the keyboard * and pressing <ENTER>. */ fileNew.connect(new MenuItem.Activate() { public void onActivate(MenuItem source) { l.setLabel("You have selected File->New menu."); } }); /* * Given that in most cases you will connect to the MenuItem.Activate * signal on MenuItems, a convenience constructor is provided: */ fileMenu.append(new MenuItem("_Save", new MenuItem.Activate() { public void onActivate(MenuItem source) { l.setLabel("You have selected File->Save."); } })); /* * A SeparatorMenuItem can be used to differentiate between unrelated * menu options; in practise, though, only use sparingly. */ fileMenu.append(new SeparatorMenuItem()); fileMenu.append(new ImageMenuItem(Stock.CLOSE, new MenuItem.Activate() { public void onActivate(MenuItem source) { l.setLabel("You have selected File->Close."); } })); fileMenu.append(new MenuItem("_Quit", new MenuItem.Activate() { public void onActivate(MenuItem source) { Gtk.mainQuit(); } })); /* * And now add the items making up the "edit" Menu. */ editMenu.append(new MenuItem("_Copy", new MenuItem.Activate() { public void onActivate(MenuItem source) { l.setLabel("You have selected Edit->Copy."); } })); editMenu.append(new MenuItem("_Paste", new MenuItem.Activate() { public void onActivate(MenuItem source) { l.setLabel("You have selected Edit->Paste."); } })); /* * CheckMenuItems hold a boolean state. One use is to allow users to * hide some parts of the GUI, as in this example which we put into * the "view" Menu: */ viewMenu.append(new CheckMenuItem("Hide _text", new CheckMenuItem.Toggled() { public void onToggled(CheckMenuItem source) { if (source.getActive()) { l.hide(); } else { l.show(); } } })); /* * A MenuItem can have a "sub-menu", that will be expanded when the * user puts the mouse pointer over it. This is also used in creating * the elements for the top level MenuBar, but you can use it within * normal Menus as well. That said, submenus of Menus are considered * less "discoverable" because the user has to navigate through the * hierarchy to find out what options are available to them, rather * than seeing them at first glance. */ fileMenuItem = new MenuItem("_File"); fileMenuItem.setSubmenu(fileMenu); editMenuItem = new MenuItem("_Edit"); editMenuItem.setSubmenu(editMenu); viewMenuItem = new MenuItem("_View"); viewMenuItem.setSubmenu(viewMenu); /* * Finally, most applications make use of a MenuBar that is by * convention located at the top of the application Window. It * contains the top-level MenuItems. */ menuBar = new MenuBar(); menuBar.append(fileMenuItem); menuBar.append(editMenuItem); menuBar.append(viewMenuItem); /* * Finally, pack the Widgets into the VBox, and present: */ x.packStart(menuBar, false, false, 0); x.packStart(l, false, false, 0); w.showAll(); /* * And that's it! One last piece of house keeping, though: it is * always necessary to deal with the user closing (what is in this * case) the last Window in the application; otherwise the Java VM * will keep running even after the (sole) Window is closed - because * the main loop never returned. */ w.connect(new Window.DeleteEvent() { public boolean onDeleteEvent(Widget source, Event event) { Gtk.mainQuit(); return false; } }); } public static void main(String[] args) { Gtk.init(args); new ExampleSimpleMenu(); /* * Yes, you could have written all the Window creation code here in * main() but it is generally good practise to put that setup into a * constructor, as we have here. */ Gtk.main(); } } |


0 komentar:
Posting Komentar